In my last post, I described how to set up a Facebook page; this post will show you how to add images to your page, how to set it “live” and the options for the page’s settings.
I’ll work with the page that I set up in my previous article, Marketing Dating as an example. The page is not yet published, and I am prompted to “Add a profile picture“, either as an “upload from computer” or an “import from website“.

A good source of profile pictures is your website itself. Open your site and hold down the “Function (fn)” key then press the “Print Screen (prt sc)” button, which will take a screen print of your page. Paste it into a tool like Microsoft Powerpoint, double click on the image and choose “Crop” from the top right editing options. This allows you to crop the image to the picture image you want to lift from your site. Save the image as a picture then upload it from your computer.
I opened my site MarketingDating.com and took a print screen shot to zoom into one part of the site and saved the image. I then used the import from web site function to look for images to use as the cover photo; this is the result:

So, the Facebook page now has the look of my web site blog, which I can start posting about, interspersed with other posts and material, including Dating Factory articles which will also include my affiliate sign up link as a recruitment tool and potential extra income generator.
The next step is to update my page info and set my page live by clicking on the “Update Page Info” button where there are four tabs to work through.

Work through “Page Info” first, where you can add in the date your site was created and a short description of your site. The update options are straightforward, so edit as appropriate. The “Notifications” settings allow you to get messages and emails about activity on your site. The “More…” options takes you to other areas such as “Page Roles” where you can enable other people to access your page, an “Apps” area where you can enable video and events features for your site, and “Mobile” to enable mobile email updates.
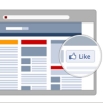
Under “General” settings, you can update your page for a whole host of features, including publishing your page, posting ability, privacy settings and age restrictions amongst others. Work through them and set the appropriate limits for your page relative to its content and targeting. Once your page is live, be the first to like it!
Then find pages, groups and people to follow by “liking” their pages, just as you do with a personal Facebook page. Click on the bar at the top of the screen with your page name in it or search on related keywords and Facebook will generate suggestions for you:

Click on the suggestions and start to build links with other pages and get reciprocal “likes”. This creates the opportunity for posts to be reposted and to receive more likes, building social signals.
In Summary:
- Create images for your Facebook page by taking screenshots of your site and cropping the images to save as pictures.
- Use the “Import from Website” option as an alternative to create a cover image, especially for creating the main site image
- Update your page settings by visiting all the tabs under the “Edit Page Info” section
- Set your page live, start posting and find pages to like, for reciprocal “Likes”.
Good luck!